Tampilkan postingan dengan label Patterns. Tampilkan semua postingan

Minggu, 29 Januari 2012

Pattern testing complete!

Three out of four, at least.  I don't know what happened to the fourth tester.  After an initial email, I didn't hear from her again. Oh well.

Here are the finished bags of the ladies who so kindly volunteered for the job (and finished it!).

From Jenny

From Mimi

From Susan
Aren't those lovely?

I've already done a number of patterns/eBooks and tutorials before but this was the very first time I've had my pattern tested by someone else.  What did I learn from this experience?

First of all, the comments and suggestions from these ladies were very helpful.  There were a few steps and photos that I wouldn't have thought of fixing up had they not told me to do so.  Overall, they did find the instructions clear and detailed and the photos very useful (which is a relief for me!).  If you've ever bought any of my patterns or tried any tutorial on this site, you would surely know that I do not skimp on photos!

What I would probably try do the next time around is have a pattern tested by people I actually know.  Like my friends here perhaps, or my sister in-law (who lives in the next suburb), or mums from my kids' schools. That way, as they sew, they can ask me and show me their work personally.  It would definitely be easier to explain things especially when something is unclear or when something goes wrong.  Sometimes, it is very hard to communicate via email alone and misunderstanding results from it.

Anyway, I am just about ready to release this eBook on "How to make a Cosmetic/Make-up Bag".  This 34-page eBook includes patterns for two bag sizes and aside from instructions on how to sew the bag, I've also added instructions on how to make your own bias binding tape.  It will be available shortly in my Etsy Shop and also on Simple Things.

Thank you once again to Jenny, Mimi and Susan.  Thank you for taking time out from your busy life to help me out.  Hope you learned something from me as I have from you.

Selasa, 17 Januari 2012

Pattern testers please!

Yesterday was a really good day.

Firstly, after a couple of months of anxiously waiting, my eldest son has been offered a place in his preferred university and at the course he really wanted.  The news came as a great sigh of relief.   The university, apart from being a reputable one, is just a 30-minute train ride from our home, making commuting super convenient. I was truly happy for my son! He is turning 18 in a few days, a milestone in itself, and this blessing is certainly a huge icing on his cake.  Yay, we now have an Accountant in the making!

During the day too, I was in the mood to sew another cosmetic bag.  Since I rarely get the urge (and the time) to sew these days, I really had to take advantage of the opportunity.  I also had that strong feeling that I could "perfect" this pattern after a third attempt so I took out our camera and decided to take photos along the way.

And I was right!  The bag turned out beautifully.  The pattern seemed flawless.  I was so satisfied with my sewing...and that doesn't happen very often!


Anyway, you know what comes with a pattern...the instructions, of course! I fixed up all my photos, typed up everything, read, reread and edited, then finally printed the whole thing as a PDF.  Even I am surprised to have come up with a new eBook in such a short time. 

Before I release the eBook, however, I do want the pattern tested.  I had some difficulty constructing my sentences so I want to make sure my instructions are ultra clear.  

Do you want to be a pattern tester?

To be considered, you must have some experience in sewing, particularly in installing zippers, bias binding, and sewing around curves.  You must also commit to:

1.  Finish the bag within a week after I email the PDF to you. (It only takes a couple of hours to make this from start to finish!)
2.  Blog about the pattern if you have a blog then email me the link so I can post it here;  or if you don't have a blog, send me a write-up with photos of your bag so I can share it here too.

Please express your interest in the comments section below.  Do not forget to leave your name and email address.

I will choose up to three (3) pattern testers.  Hopefully, there are a lot of volunteers out there so I will actually have people to choose from!

Anyone???

UPDATE (21/1/12):  PATTERN TESTERS ALREADY CHOSEN. THANKS.

Minggu, 05 Juni 2011

A Travel Wallet...finally

Ever since I opened my Etsy shop, I have found myself needing to constantly come up with new things to sew.  I suppose always having some new pattern is the only way I can keep people interested in coming back to the shop.  It can be frustrating at times.  Ideas do run out. At least, for me.

The idea of making a travel wallet has been on my mind since last year.  I've sat down countless times, drawn up pages and pages of layouts, only to end up shelving the project for another day.  Thankfully, not this time around.

I literally forced myself to complete this task.  I had little baking to do last week and had to take advantage of the spare time.  Finally, it all came together on the weekend.  I am pretty pleased with what I came up with.

The closed wallet is about 4 3/4" by 8 1/2".

Opened,  showing how organized everything can be.
For me, a travel wallet should carry all the essentials while at the airport and while in-transit.  To come up with the design, I listed down what I normally did and  needed when I travelled, especially overseas.

First of all, at check-in, I am asked to present my passport, my eTicket and usually the credit card I used to pay for it.  After that, I am given my boarding pass and this card that I have to fill in before I proceed to immigration.  This is when a pen comes in handy.

The left side has two angled pockets, one for  the passport and one for the airline ticket and boarding pass.  It also has an elastic pen loop.
When everything's done, I usually walk around the airport to pass the time.  Sometimes I need a little cash to buy a magazine or a snack.

The right side has an ID window, some card slots, two long pockets for cash and a  key holder.
While in-transit, before I reach my destination, I need my pen again to fill up a customs declaration form. Upon arrival, I have to have my lock key ready just in case I am asked to open up my luggage.  Sometimes I also need to have foreign currency with  me to pay for something at the airport.

Basically, that's it.  Did I forget anything? I reckon with this kind of wallet, I would have everything organized for a smooth travel.  I must say that while it looks good, the ID window is actually unnecessary.  I just might ditch that when I make the final pattern.  Also, I didn't find a zippered pocket for cash important because I wouldn't really think of keeping lots of money in here.

I have a few more travel-themed fabrics on hand so I will definitely be making more of this.  Just have to give my fingers a bit of a rest....they're quite sore from hand sewing the bias tape through those thick layers!  I will also work on the pattern and instructions next.  If you could tell me what you think of it, I'd appreciate it a lot.  

Hurray for something new!

Kamis, 13 Januari 2011

The Errand Clutch

Didn't expect me to be back so soon, did you?  Even I suprised myself!

I tried my pouch again today.  And...I am happy to say that this time, it turned out just as I had envisioned it. 

I love this fabric!  It's even much more beautiful in person.


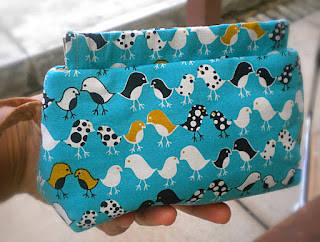
Looks small but is actually quite roomy.  The flex frame closure will keep everything secure inside.

The bottom is darted rather than boxed.


I think I got it right with this one...from the shape down to the size.  Just right for bringing along keys, mobile phone, driver's license and some cash for those quick trips.

Now, to work on my pattern...I think I'm going to call this my Errand Clutch.  Be back with that soon!

Selasa, 30 November 2010

Mini Tutorial: How to Make a KitchenAid Mixer Cover

Last week, my sister in-law invited me to their home so I could teach her how to successfully bake a chiffon cake.  As she has a KitchenAid mixer, I wanted to show her how easy it was to beat the eggwhites stiff.  She bought her mixer early this year but has not done much with it really.  

I had always seen her mixer uncovered and her birthday is in a couple of days...so guess what I decided to make for her?

There's no mixer underneath.  The cover is so thick and sturdy, it holds its shape perfectly and stands up on its own.

My fabric has directional prints, so as you can see,  the design on the main body is upside down on this side.  I should have taken the photo from the other side!

This is one of those things I wish I could keep for myself, not only because the cover turned out very pretty, but mainly because of the amount of work I put into it.  First of all, I am not a quilter so I was quite impatient with the quilting part of the process.  And why on earth I did so many lines when I could have done less, I really don't know.  Another thing is that I have a fear of bias binding and I also don't quite enjoy hand sewing. I have in fact avoided having to deal with bias binding for the longest time.  Having said that though, it turned out there was nothing to fear after all.  (But I did prick my fingers a few times.)

What made the whole project easier was that I already had an existing pattern.  If you remember, I made a cover for my own KitchenAid mixer sometime ago.  The way I made that one is actually different (this new one is way better), but the fabric pieces are basically the same.

So, ok.  The title of this post suggests that I have a tutorial for this mixer cover.  I call it a mini tutorial because I did not take photos as I sewed.  This will not be as detailed as my other tutorials so some experience in sewing is quite vital.  I am afraid beginners might get lost somewhere. Basically, I will just be providing you with the pattern, the material requirements, and the general steps on how to make your own cover.  Please take note that my cover was made for a 5 quart KitchenAid ARTISAN mixer. 

MINI TUTORIAL: How to Make a KitchenAid Mixer Cover

Requirements:

1 meter quilting weight cotton fabric for outer cover (non-directional prints preferred)
1 meter quilting weight cotton fabric for lining **
1 meter sew-in cotton or polyester batting
quilt basting spray
about 5 meters double fold bias tape in coordinating colour
matching thread
other sewing essentials such as scissors, needles, ruler, marker, pins, sewing machine, etc.

** This cover is reversible.  If you want a change in look every now and then, choose a pretty lining fabric.

Procedure:

1. Download pattern for the front/back panel here.  With Page Scaling set to NONE, print out the pattern pages.  Cut out the pattern pieces just outside the thick black lines and glue together as instructed.

Please take note that since the patterns were drawn with thick marker, you may find slight discrepancies in the measurements.  Please countercheck with indicated measurements and adjust accordingly, if necessary.

After assembling the pattern pieces, you should have something like this:

This is the complete pattern for the front/back panels of the mixer cover.

2.  From main fabric, lining, and batting, cut the following:

    2 pieces each -  16"(L) by 11"(W) for the front and back panels
    1 piece each - 36"(L) by 16"(W) for the main body

3.  For the front, back and main body panels, sandwich batting between the lining (wrong side up) and the main fabric (right side up).  Following the manufacturer's instructions, use quilt basting spray to temporarily adhere layers together. 

4. Quilt panels as desired. (In my cover, the horizontal and vertical lines are about 1 1/4" apart.)

5.  Using the pattern piece as a guide, cut the front and back panels to size.  Trim the main body to 34 3/4" (L) by 15" (W).

6.  To assemble the cover:

Start with the front panel.  Find and mark the center of the curved top.  With lining sides together, match the center of one long edge of the main body panel with the center of the front panel.  Pin together starting from the top, then go down the sides.  Machine sew using a 1/4" seam allowance.

Do the same with the back panel.

7.  Apply bias tape to the front and back seams.  (I machine sewed the bias tape on one side and hand sewed the other side for a neat finish.)

8.  Finish off by applying bias tape along the bottom edges.

Was that understandable?  Frankly,  I am not used to writing a tutorial without loads of pictures to go with it, so I hope that was clear enough.  The structure of the mixer cover is really very simple.  Quilting and bias binding did complicate the whole thing just a bit.  You may opt not to quilt or maybe you can use stiff interfacing instead of batting.  It's up to you. 

Anyway you choose, hope these instructions will be of some help.  Happy sewing!  And happy baking too!

Selasa, 14 September 2010

Project: My recipe journal

When it comes to my cooking, my kids are my biggest fans. Although I do not cook anything fancy, they nevertheless look forward to most meals because they know I would cook up something they would love to eat. And the dessert...that makes them even happier. One of the things I would want to pass on to them are, of course, the recipes. I would love for my children to learn to cook the food that they grew up with and be able to share them with their own families in the future.

For this reason, I have started an important project...my recipe journal. At the moment, the recipes I use are all over the place -- in cookbooks, computer printouts, handwritten notes, etc. My dream is to have a single compilation of my family's most loved recipes. It would include recipes that have been handed down to me as well by my own mother and my aunts.

I would like it to be very personal. It is certainly much easier to type up the recipes on the computer but I would rather have them handwritten. So when my children would read through the recipes, they would have memories not only of the food but of me.

Today, I bought myself a hardbound notebook and then I dressed it up with my fabric journal cover.
 

I purchased the fabrics from Spotlight a while back. You've seen glimpses of them in my patchwork zippered pouch but this recipe journal is a more suitable use for them.


I haven't started writing a recipe down yet. I have to do this with patience to make sure it will be a beautiful legacy. The first page I will be reserving as a dedication page so my kids will know that this was lovingly done for them.

Can't wait to get this project going.

Minggu, 29 Agustus 2010

A wallet and a pouch

What a tiring couple of days I had.  Apart from the usual things, I had to make a cake plus cupcakes for a birthday.  Baking is fun but it always becomes a bit stressful for me when I am getting paid for it.  I have come down with a cold and have a slight toothache as well.  But here's something that has brightened my weekend inspite...I have a new wallet!


I've been needing to make a new one and have been procrastinating for a while now.  So yay, I'm happy I finally got it done. 

I used my own long wallet pattern, but since it's been a long time since I last made a wallet like this, I had to bring out my print-out of the instructions!

 
I totally love this owl fabric but am a little worried it will get dirty right away.


I had some leftover fabric from the two fat quarters I used and found inspiration over at Pink Penguin's to make a patchwork zippered pouch.  I didn't use her tutorial though since I am already used to my own way of sewing up a pouch like this...

How cute is that?


I skipped the strap because the pouch turned out a little bigger than I originally wanted it to be.  The finished size is about 6 1/4" (H) by 8 1/4" (W). 

I know my son wouldn't use this for his DSi XL (though it's certainly a perfect fit), thus I have decided to list this on my Etsy shop instead.  I don't usually sell the things I sew, so here's your chance.  If you're interested to have it, just head on over here!

Hope you all have a great week ahead!

Selasa, 17 Agustus 2010

New eBook and GIVEAWAY!


Yes...I made another one of my pretty toilet paper roll cozies. This is very similar to the first one but I would say, is a much improved version. The size is more exact and also, it is sturdier because I had lined it with cotton batting. This way, it would hold its shape and won't collapse as the toilet paper is being used up.

I took pictures as I sewed. For whatever it's worth, I went ahead, laboured, and made the pattern and instructions for it. I personally think the cozy is a pretty neat idea, though I am unsure if many people will be interested in making one for themselves. It is really just one of those simple, functional things that I love creating.

To come up with one standard size for the cozy, I had to look at the different brands available in our local supermarket. I found that as far as sheet size is concerned, the Australian standard appears to be 11 cm by 10 cm (about 4.3" by 3.9"). However, different brands had various number of sheets per roll and also there's one-ply, two-ply and even three-ply. The main difference, I think though, lies on the thickness of the paper because this ultimately determines the total volume of the whole roll. For instance, the inexpensive supermarket brand with 210 sheets and thin paper had less volume than the more expensive kind with extra thick paper and only 180 sheets.

In the end, I decided to settle with the Kleenex brand. I figured, this was a brand that most likely existed worldwide. Its size and volume is also comparable to most of the other good-quality brands I saw. Having said that, I am quite certain the cozy will fit any regular, standard-sized toilet paper roll out there, whether it's Kleenex or not.

The eBook is finished and is now listed in my shops, here and here.

For a chance to win a FREE copy of this new eBook, just leave a comment below. Sign up to be a follower if you aren't one yet. And please do not forget to include your name, as well as a way to contact you (email, blog, etc) in case you win. Entries close on Sunday, the 22nd Wednesday, the 25th. Winner will be announced the following day, Monday, the 23rd Thursday, the 26th. Hope you can all join, thanks!

Selasa, 22 Juni 2010

Tips re Water Bottle Carrier pattern

A couple of ladies have emailed me recently asking for some help with my water bottle carrier pattern.  I've decided to make this post to give some tips not only for them but for others who have bought the eBook from me as well or for those who are thinking of doing so in the future.

The main concern has been how to pin the circle base to the cylinder body so it will fit neatly.  Before I proceed, it is my assumption that: 1) the required seam allowance for the cylinder was followed strictly, and 2) the circle base diameter was correctly obtained using the formula in the eBook.

Why does the circumference of the circle base seem bigger than it should be?

The answer is...because it really should.  The unsewn circle base includes the seam allowance, therefore, it's circumference is slightly bigger than the circumference of the already sewn cylinder.


When aligning the circle base to the cylinder, do not attempt to pin together along the edges because it will not work.  What you should be aligning to the cylinder is the (imaginary) stitching line, as shown in the photo above.  To do this, press the edges together, push the center of the circle in and pin where the stitching line would be.  You may not find the exact fit immediately but as you adjust the pins, it should end up fitting correctly.

After you have sewn the pieces together, you will see (as in the photo below) that the circle base is pushed in.  The final circumference of this circle is now exactly the same as the body of the carrier.


When you turn the bag to its right side, you should have a nice circle bottom with no tucks (or if there is any, it shouldn't be noticeable).


I don't know if my explanation was clear enough, but again, with accurate seam allowances and correct circle diameter, you shouldn't have any more problems.

Let me know how it works out for you.

Rabu, 20 Januari 2010

In the past week...

...I got my first cake order! Was reluctant at first to accept because I was afraid I would stuff it up.  It was for my sister in-law's niece, who, for her 17th birthday, only asked for one thing...a soft and light chocolate cake. As most cakes in the shops here are heavy and super rich mud cakes, my sister in-law thought of asking me to bake for her.

So glad I did...I was super pleased with how the cake turned out and I got great positive feedback from those who feasted on it!


I love the flowers (but honestly, I don't even know what those are supposed to be!).


Yesterday, it was my eldest son's 16th birthday.  Naturally, I had to make a birthday cake for him as well.  It's much harder to do one for a boy, isn't it?  I couldn't put flowers in even if I wanted to...

I opted to design the cake with his favourite NBA team in mind, the Orlando Magic! (I had to promise my other son I would make him a Lakers cake come his birthday.)


Got the team logo off the internet and printed contact print sizes to make those little flags!

I do think I am getting better with cake decorating.  Still amateurish, but considering the fact that all my skills are self-taught, I should be pretty happy with myself...

In the sewing front this time...I managed to sew another digital camera cozy.
 

The Hello Kitty fabric is way cute!


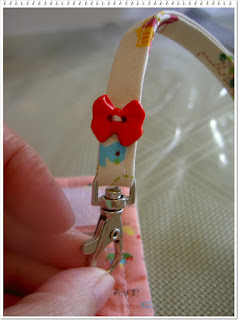
A nice finishing touch is this little red bow button.

The new eBook and pattern for this digital camera cozy is now available here and here.  You might wonder how I was able to complete that one so fast.  After already writing up many tutorials in the past, the process really does get easier.   There are no complicated steps in this particular project so I encourage all those with boring camera cases to give the pattern a try!

Before I end, let me just leave with you with this music video of my current favourite song.  Puts me in a good mood everytime, just like the people in the video!