Uninspired.
That probably sums up how I've been feeling in the last month or so. I believe the cause is a combination of plain burnout as well as emotional stress from having to deal with some personal issues lately. Or maybe, just maybe, I am just nursing a hole in my heart after having watched 9 seasons of "The Office" straight and seeing it end :(.
For quite a while now, I have been thinking of making a sequel to my Frosted Heaven book. I have actually already listed the chiffon cake varieties that I wanted to include in it but just the thought of having to make the cakes one by one so I can test them and take photos as well is making me feel sick already. Can you believe that? Me, getting sick of chiffon? For the time being, I'm afraid it's true so I have put this project on hold for now.
Last month, two of my kids had their birthdays. No chiffon cake for us! For my daughter's birthday on the 28th, I made a cookies and cream cheesecake. She prefers cheesecake over cake anyway so, more than anything, this was a welcome change. For my son's birthday a few days later (on the 31st), I made sans rival. Believe it or not, although this is a Filipino favourite, it was my first time ever to make this dessert.

Since our oven is small and can only accommodate 2 baking trays at a time, I only made two meringue wafers which I each cut in half to make four layers. The finished cake was only about 8"x6" but it was more than enough for the six of us. As a matter of fact, it lasted for three days. Not that it was not delicious. It definitely was. However, being a really rich type of dessert, you can only eat it in little portions at a time.
Next time you feel like having something different (other than chiffon cake!), hope you can give this a try. Enjoy!
SANS RIVAL (makes a four-layered 8"x6" cake)
For the meringue wafers:
Ingredients:
1 cup eggwhites, room temperature
1/2 teaspoon cream of tartar
1 cup granulated white sugar
1 cup coarsely chopped unsalted roasted cashews **
**Although cashews are traditionally used, you can substitute this with other nuts such as almonds, pistachios, macadamias or whatever nut you prefer.
Preheat oven to 150C (300F).
Cut two pieces of baking paper about the same size as the underside of a large baking tray. In the center of each, draw an 8"x12" rectangle.
Lightly grease the underside of two baking trays. Stick each baking paper to a greased tray, drawn side down. Just to make sure it would be easier to take off the baking paper later on, you can also grease the tops.

In a mixing bowl, combine eggwhites and cream of tartar. Starting from a low speed gradually increasing to medium, beat until frothy. Slowly add in sugar, then increase mixer speed to high and beat until eggwhites are stiff but not dry.
Gently fold in the chopped cashew nuts.

Divide the meringue equally between the two lined trays. With an offset spatula, spread the meringue out using the drawn rectangle as a guide but go slightly past the lines. Make it as level as you possibly can.

Bake meringue in preheated oven for about 1 1/2 to 2 hours, or until the meringue is dry, crisp and a light brown colour. (As I always say, since different ovens behave differently, baking time may vary.) The important thing is that the wafers are crunchy - soft and soggy wafers are no good!
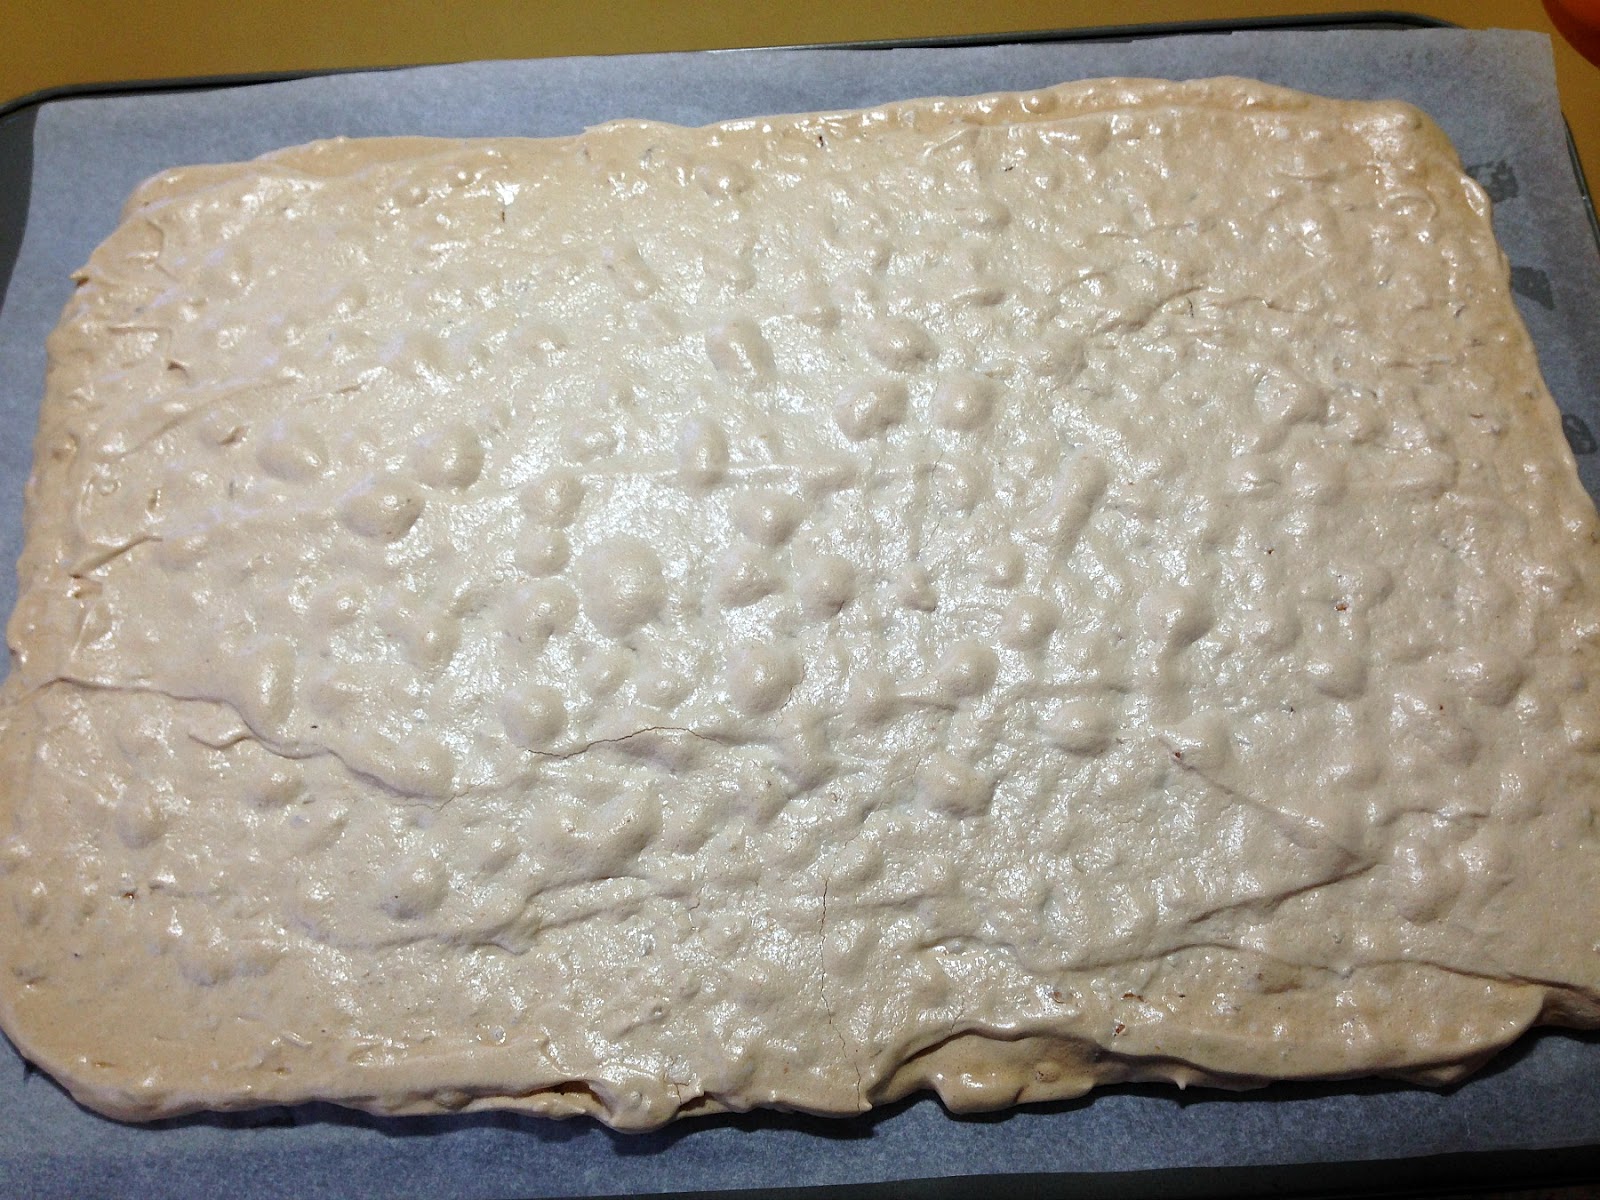
While still hot, use a long, sharp knife to carefully trim the sides of the meringue to make the edges straight (and aligned with the drawn rectangle on the baking paper). Cut each meringue in the center to make four 8"x6" pieces. Now that the pieces are smaller, they are easier to take off from the baking paper. Do this slowly. If you accidentally crack the meringue (like the lower right side of the meringue below), don't worry about it as you will be able to "repair" this with buttercream later.

For the French buttercream:
Ingredients:
1/2 cup granulated white sugar
1/4 cup water
2 eggyolks
1 whole egg **
1 cup butter, softened
**Typically, other recipes use all eggyolks. This is just how my aunties made their version. The whole egg makes the buttercream a tad lighter, I suppose. If you want all eggyolks, you can use a total of 5-6 instead.
In a small saucepan, mix together the sugar and water. Bring to a boil over medium heat. Clip a candy thermometer onto the side of the saucepan. Once the temperature reaches about 90C (200F), start beating your eggs.

When syrup reaches 115C (240F), take it off the heat. With mixer at low speed, slowly pour the hot syrup into the eggs. Aim for the area in between the mixer and the beaters. If your syrup hits your beaters, it will splatter to the sides of the mixing bowl instead of combining with the eggs.

Beat the egg/syrup mixture until thick and light in colour. Set this aside in the fridge to cool.

When cool, return bowl to the mixer, beat at medium speed while gradually adding in the soft butter. Scrape down the sides to make sure all the butter is incorporated.

Once all the butter is in, increase mixer speed to high and beat until buttercream is light and fluffy.

To assemble Sans rival:
You will also need: 1 cup or more of coarsely chopped unsalted roasted cashew nuts (or whatever nut you used in the meringue).
On a cake board, alternate layers of meringue wafer and buttercream. As the buttercream is very rich (and can become cloying if taken in large amounts), spread thinly only. If you have any cracked wafers, use a little buttercream to "glue" them together. Cover the entire cake with the rest of the buttercream.

As with the cake pictured at the very top of this page, you can finish your sans rival off by piping borders (if you still have leftover buttercream) and by covering the top generously with chopped cashew nuts.
Or if you absolutely love nuts, you can cover even the sides with more cashews!

Keep the sans rival in the freezer in a box or in an airtight container until time to serve to keep the meringue crunchy. Use a very sharp knife to slice.

Remember to cut into small pieces only!


Tidak ada komentar:
Posting Komentar