Minggu, 28 Desember 2014

Ube cake roll

This will be my last post for 2014.  I do not know WHEN I will be back or IF I will be back.  At this point, I feel I just need time to reassess whether this blog is still something I want to continue in the coming year or if I would want to do something else.

After a year that has been totally overflowing with cakes and more, it is but fitting to finish off with a last recipe. This is my end-of-the-year gift to all of you.

An ube cake roll!  Simple but lovely and tasty as it is.  No frosting needed.  No frills.  


The cake is basically made in the same way as the normal ube chiffon cake, except that it has a little less flour.  This adjustment allows for a more flexible, easier to roll cake.


Something new I learned from making the deco roll cakes is that it is really not necessary to roll the cake straightaway.  Normally, with jelly/swiss roll cakes, you would need to roll the cake in parchment paper or a tea towel dusted with icing sugar while still hot so the cake will cool down in this shape and will be easier to re-roll once filled.  What I found out is that all you need to do is loosely cover the cake with parchment paper while it is cooling down in a wire rack to keep the moisture in but at the same time, letting heat escape. It does work!

I've never really had much success with roll cakes until recently, so I hope you will get to try this cake and be happy with it just like me! :)

Here goes:

For the chiffon cake:

Ingredients:

{A}
1 cup cake flour
1 1/2 teaspoons baking powder
3/8 cup sugar
1/2 teaspoon salt

{B}
4 egg yolks
1/4 cup vegetable/canola oil
1/3 cup milk
50 grams grated purple yam
1/2 teaspoon ube flavouring
1/4 teaspoon violet gel paste or food powder

{C}
4 egg whites
1/4 teaspoon cream of tartar

{D}
3/8 cup sugar

Procedure:

1.  Preheat oven to 170 degrees Celsius.  Line a 10"x15"x1" or 11"x16"x1" jelly roll pan with parchment paper.  Grease parchment paper with a little oil.

My baking pan is actually a 10"x14"x1 1/2" so the resulting cake is a little bit thicker than what is ideal.

2.  In a large bowl, combine {A} well.  Add in {B}.  Beat with electric mixer or by hand until smooth and well blended.
3.  In a separate bowl, beat {C} on high speed until frothy.  Gradually add in {D} and beat until stiff peaks are formed.  Gradually and gently fold in egg whites into egg yolk mixture.  Pour batter into prepared jelly roll pan then spread evenly to the sides.  Bang pan on the counter a few times to dislodge air bubbles.


4.  Bake for about 25-30 minutes.


5.  Cover the top of the pan with a new piece of parchment paper then invert onto a wire rack. Unmould the cake then immediately peel off the parchment paper from the bottom.


6.  Cover the cake with another piece of parchment paper.  Leave to cool just until it is no longer warm to the touch, about 15-20 minutes.


While waiting for the cake to cool down, prepare your whipped cream filling.  You can make half the stable whipped cream recipe here or if you want something simpler, you can just use this.

Whipped cream filling:

1 1/4 cups thickened or whipping cream, very cold
2 tablespoons caster sugar

Combine ingredients in a cold mixing bowl.  Beat until stiff.


To assemble cake:

**It is best to assemble the cake as soon as it is no longer warm.  The longer the cake sits, the drier it will become and will most likely crack when rolled.

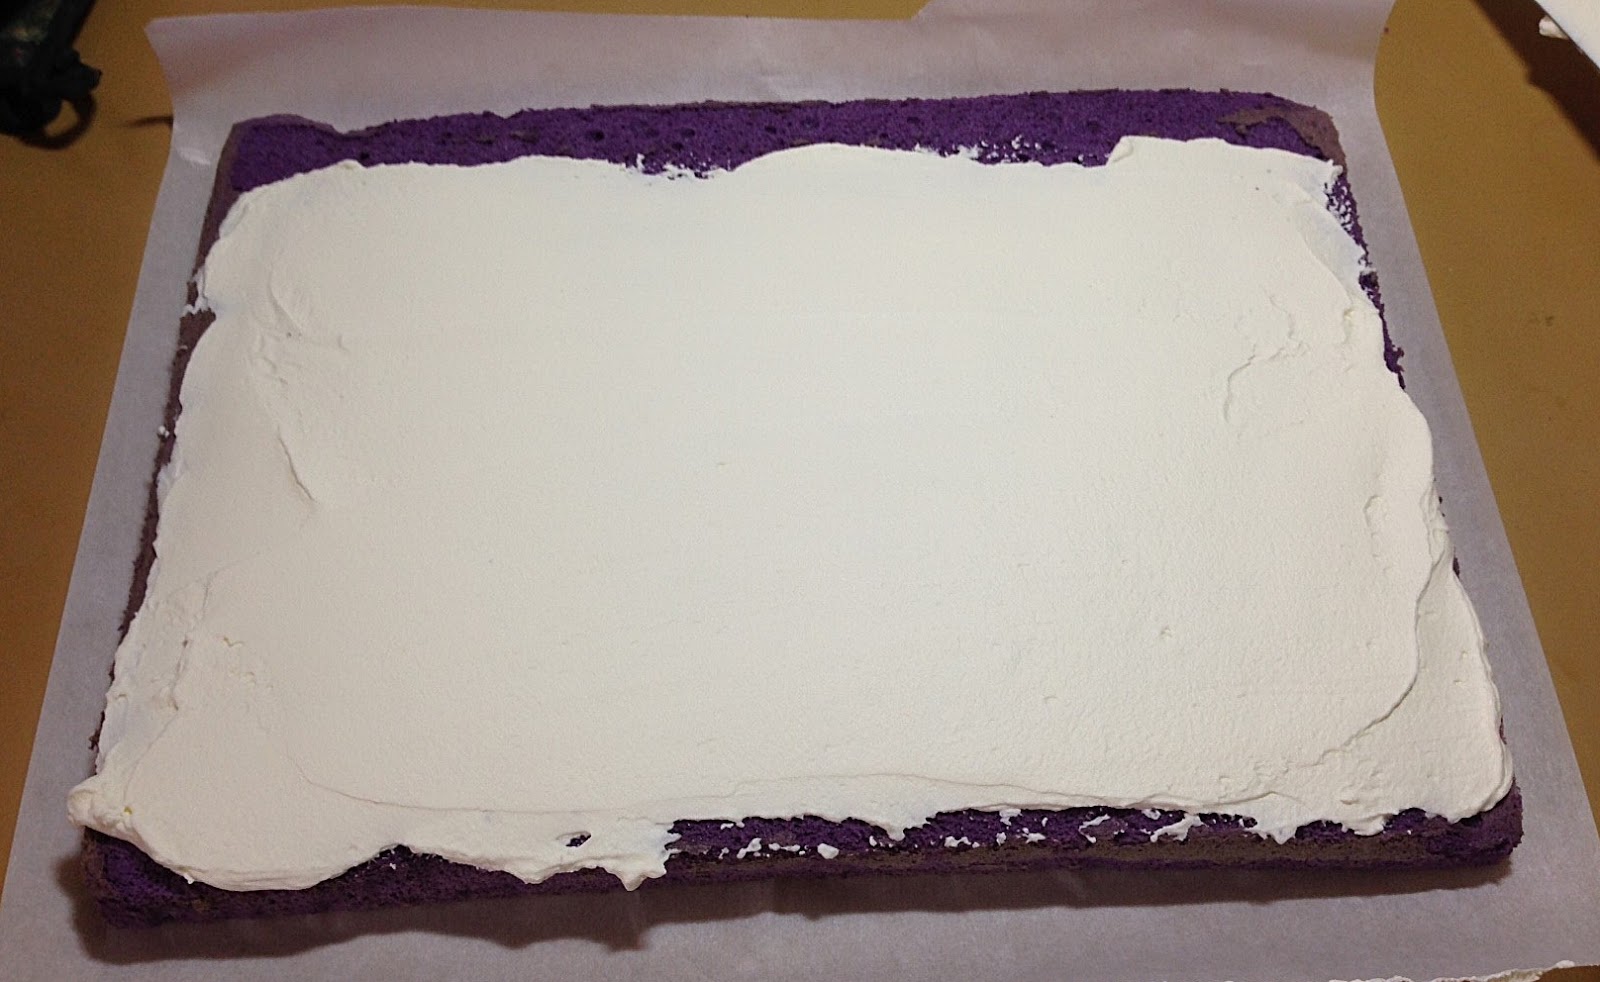
Carefully flip the cake over.


Spread about 3/4 of the whipped cream filling evenly on the cake, leaving about an inch space at the top.


Starting from the side nearest you and using the parchment paper as a guide, gently roll the cake.


This is what the newly-rolled cake looks like from the side.

Refrigerate the cake for about an hour to allow it to firm up a bit and make it easier to handle.  Chill the remaining whipped cream as well.

Unwrap the parchment paper then trim about an inch off the two ends.  Transfer cake to a serving tray.

Doesn't that look just perfect?

Fill a small piping bag fitted with a large star tip with the remaining whipped cream then pipe out rosettes along the top of the cake roll.  Top each rosette with a macapuno ball, if desired.


Keep the cake covered to retain its soft and moist state. Serve chilled to enjoy it at its best!


A blessed 2015 to all!

Rabu, 24 Desember 2014

Christmas greetings


From Melbourne to the rest of the world, here's wishing you all a blessed Christmas!

May you receive the lasting gift of joy, peace, and love that comes from Jesus Christ.

Have a great time celebrating with family, friends, and all your loved ones!


Senin, 22 Desember 2014

My new favourite thing to make

If you still haven't seen or heard about decorated roll cakes, then you must have been living under a rock in recent times!  Deco roll cakes were created and popularized by a famous Japanese food blogger named Junko.  As with anything Japanese-made, these cakes are just oozing with cuteness!

Image credit: kao-ani.com
Image credit: japanrollcake.com

I have been wanting to buy Junko's books since early last year but they were written in Japanese.  I really didn't want to go through the struggle of translating so I had to forego buying them and content myself with just admiring photos of deco roll cakes online.

Just over a week ago, while looking for books on the internet, I accidentally discovered that Junko's books have already been published in English!  Of course, I wasted no time in ordering them!!!


So far, I have tried making three of the deco rolls in the first book, all of them incidentally featured in the cover.

Strawberry print roll - vanilla flavoured cake with whipped cream and strawberries.


Teddy bear deco roll - chocolate flavoured cake with whipped cream, mangoes and strawberries.


Arabesque motif deco roll - matcha flavoured cake filled with whipped cream and sweet red bean paste.


The cakes are chiffon-type so as expected, they are very soft and moist.  However, unlike the chiffon cakes that I am used to making, these ones have less cake flour and have no baking powder.  I think the lower flour content makes the cakes easier to roll.  They do not crack at all!  (And they are not even rolled while still hot.)

As you know, my family isn't all that crazy about eating cake so while I hope to try all of the designs in the books (as well as make my own), I really have to control myself.  At first, I thought the cuteness was enough to convince my kids to keep on eating the cakes one after another, but now I realize that no matter how light and delicious they are, I cannot keep on making them every single day!  I should really consider giving these as gifts!

You will definitely see more of these cake rolls here in the future.  I really wasn't keen on making cake rolls before but now that I've tried and found the process quite easy, I think my next move would be revising my own chiffon cake recipes so they would be more suited to be made in this manner.  Hmmm,,,I reckon I'll start with an ube cake roll. :)

Till next time.

Jumat, 12 Desember 2014

Ending my caking year

I am so sorry for being away for almost a month.  The 2014 school year concluded early December so as you can imagine, I have my hands full with the kids in the house all the time.  Also, I have been concentrating on finishing all my cake orders for the year.  I am taking a break starting this coming week till early January so I can do things that I have been procrastinating on (#1 on the list: a second book).  Plus I also want more time to prepare for Christmas.

For my last big cake commitment, I made a two-tiered cake, a large caramel cake plus two dozens red velvet cupcakes for an 18th birthday party.  As you will see, I went all out on the buttercream roses! I really like the old-fashioned look they project even though gumpaste flowers may look more life-like.


In this past year, I think I made more caramel cakes than ever before.  Since I started selling cakes, my most sought-after product was the ube macapuno, but now, people have shifted to the caramel cake.  I believe this cake suits the Filipino taste best because it's not overly sweet.  More than that though, there is just something so endearing about the buttercream roses, don't you agree?  Oh and let's not forget those lace-like squiggles too - no matter how messy they seem to appear while piping them, they still end up complementing the whole traditional vibe. 


I really loved making this two-tiered cake although at first, I was afraid it was going to be a complete disaster. While positioning the roses and piping the leaves, I kept on hitting the soft buttercream. This is the downside of using a non-crusting buttercream like SMBC.  You can't smooth it out just like that!  If you look close enough, you will notice the uneven cake comb marks on the bottom tier.  I accidentally touched it and couldn't fix it properly because the ribbon and the roses were already in place :(


I piped all the buttercream roses the night before I assembled this cake and put them in the freezer.  It was a breeze to just position them all later.


I didn't totally go all-buttercream and it would have been really neat if I did.  The #18 topper and the cutout letters for the celebrant's name were made from gumpaste.  I also moulded gumpaste roses and cut out leaves for the cupcakes.  It just saves time to be able to do all these in advance.


So there you go.  That is my way of ending my caking year with a bang.  I still have a few more cakes to do before Christmas though nothing extraordinary.  Hopefully, if all goes as planned, our Christmas cake will be something new.