Senin, 29 September 2014

Cookies and Cream Cake Version 2

Not too long ago, someone had asked me to make a cookies and cream cake for their daughter's birthday.  Easy enough, right?  The thing though was, they wanted a different kind of cookies and cream cake.  Something that looked like this...


After doing an internet search, I discovered that the cake pictured above was actually from Baskin Robbins, meaning, it was an ice cream cake!

To recreate the same look but with my chiffon cakes, my first thoughts were: 1) I needed to bake two types of cakes; and 2) I needed two types of frosting as well.

So, how did I fair?  Here is the cake I ended up making...


Unfortunately, I didn't take any photos while I was making this cake.  I don't have a photo of the sliced cake either so can't really show you what it looked like inside. The best I can do is give you an idea on how to make it.  I hope it will be of some help in case you decide to make something similar in the future.  Here goes...

The cakes:

1.  Bake one 8" round chocolate chiffon cake (recipe here) and one 8" round vanilla chiffon cake (recipe here).

To transform the vanilla chiffon cake into an Oreo chiffon cake, you will also need about 6 whole pieces (cream included) of Oreo cookies which you will coarsely chop.  Do not use a food processor or crush the cookies into a fine powder as you want them to be very visible inside the cake.  Once you've made the vanilla chiffon cake batter, gently fold in the chopped cookies then proceed to bake as usual.

The frosting:

The cake is covered in whipped cream frosting, while the borders and drizzles are dark chocolate ganache.  On the day you are to assemble the cake, it is best to make the ganache first.  Set it aside to cool down while you make the whipped cream frosting.  By the time you finish covering the cake with whipped cream, the ganache will have cooled completely and be at the right consistency for drizzling.

STABLE WHIPPED CREAM FROSTING (as usual!)

Ingredients:

2 cups whipping or thickened cream, very cold
1 bar (250g) of cream cheese, cold
1/2 cup sugar
1 teaspoon vanilla extract

Procedure:

Cut up the cream cheese into small cubes.  In a small bowl, beat the cream cheese until smooth.  Set aside.

In your chilled bowl and using clean beaters, beat the whipping cream, sugar and vanilla until the mixture is quite stiff. Gently fold in the cream cheese then beat again at high speed for about 45 seconds or until everything is well combined.  Be careful not to overbeat.

DARK CHOCOLATE GANACHE

224g dark chocolate, chopped or chips
3/4 cup whipping or thickened cream

Place chocolate chips in a medium bowl.

In a small saucepan, bring whipping cream to a boil.  Pour over the chocolate chips and let stand for 1-2 minutes without stirring.

Stir with a whisk until smooth and shiny.

NOTE: You will use this ganache in two stages.  First, while it is still in its pourable state and second, when it has thickened enough for piping.

To assemble this cake:

1.  Cut the two chiffon cakes in half horizontally.  Preferably, use the bottom layers of each cake.  Set aside the two extra layers from each cake. (If you want, you can use 3/4 or even the whole Oreo cake rather than cutting it in half to more or less get the same look as the ice cream cake where the top layer is thicker.)

2.  Place a layer of chocolate cake on your cake board, cut side up.  Spread some of the whipped cream. Top with the Oreo vanilla cake, cut side down (or if using the whole cake, bottom side of the cake up).

3.  Cover the whole cake with whipped cream.  Place the remaining whipped cream in a piping bag fitted with a large star tip.  Pipe 8-10 equally-spaced big stars around the cake top, leaving about an inch allowance all around for the ganache borders and drizzles.

4.  To do the drizzles, you will need to use your ganache when it has cooled down but still in its liquid form.  Place some of the ganache in a piping bag.  Snip a little bit off the end.  Drizzle some of it on top of the whipped cream stars and then around the cake edge.  (I found a really great video on how to perfectly do the drizzles - watch here!)

5.  Set aside your cake in the fridge while you wait for the remaining ganache to thicken.  You can either leave it at room temperature or put it in the fridge to speed up the process.  Just don't let it harden or else you will have to heat it up again!

When the ganache is ready, mix it gently with a spoon then place it in a piping bag fitted with a star tip (#18 or #21).  Pipe a shell border around the top and bottom of the cake.

6.  To finish off, insert Oreo cookies in between the whipped cream stars on the cake top.


Not a bad effort.

Hope you like it!

Senin, 22 September 2014

TUTORIAL : How to make a (super adorable) USB Flash Drive case

Yes, you are in the right place.  And yes, this is not a recipe!  It's sewing-related!!!!

Remember this? Can't believe it's been more than two and a half years and still no tutorial.  I must really apologize for my lack of commitment to that promise.  To my readers who originally came here for the sewing, I am so sorry that you have found no sewing activity here for so long!

Since it's the school holidays, I made this plan to finally make the tutorial.  It seems I got too excited to sew, that yesterday, in between breakfast and lunch, I finished the whole thing!

Isn't that absolutely adorable?


This is in fact a one-sitting kind of project.  It's pretty easy.  However, I would still recommend it for people who have some sewing experience particularly in bias binding and sewing over multiple fabric layers and around curved seams.  I have had no practice in tutorial-making for sometime now so I might be making unclear instructions here and there that beginners will find hard to understand. Still, if you are new to sewing and are interested to make one of these cases, just consider it a challenge!

HOW TO MAKE A USB FLASH DRIVE CASE

Materials:

fabric scraps
small piece of fusible fleece
small piece of plastic
25" long two-inch wide bias tape**
one 2" long velcro
one key ring or swivel hook

**It is best to just make this yourself as you are only going to need a small length.  If you don't know how, learn from here.  You need to cut 2" wide strips.  Keep the tape open for now (no need to fold it).

Procedure:

1.  Download the pattern from here.  Print it out in Actual Size.

2.  Cut out the pattern pieces then use them to cut out your materials.

     A: Cut two pieces from outer fabric for the flaps .
     B: Cut one piece for the lining.
     C: Cut two pieces from fusible fleece.
     D: Cut two pieces from plastic.

     In addition, cut three 2"x 2" squares from outer fabric.


3.  Iron on fusible fleece to the back sides of the flap pieces.


4.  Take one of the 2" square pieces,  Fold it in half to create a crease then open again.  Fold two opposite sides towards the center crease then fold again to end up with a 1/2" wide strip. Iron.  Do this for the other two 2" squares.


5.  Take one of the strips and stitch along the two long sides, about 1/8" from the edges.  Insert your key ring (or swivel hook) then bring the raw edges together to make a loop.  Sew the raw edges together.


6.  Center your key ring loop on the straight side of one of your flap pieces.  Baste.


7.  With right sides facing (with key ring loop inside), sew the two flaps together.  Sew right where the end of the fusible fleece is.


8.  Open up your flaps, right side up.  The seams will naturally fold towards one side (in my case, downward), in the opposite direction of the key ring loop.  Topstitch very near the center stitching where the two flaps were sewn together, catching the seams at the back.


9.  Insert the remaining two 1/2" wide strips (from step 4) into the straight edges of your plastic pieces.  Topstitch close to the inside edges.


10.  With wrong sides facing, baste together your assembled flaps and lining.


11.  Position your two plastic pieces on the two ends then baste.  If you are having trouble with sewing over the plastic, stick a small piece of magic tape on the underside of your presser foot so it will move smoothly.


12.  Position your velcro 1" from the top of the curve on both ends. Stitch along the long sides of the velcro.  Cut off the excess velcro, following the shape of the curve.


13.  Fold one end of your open bias tape 1/4" in, then fold the whole length of the tape in half lengthwise and iron flat.


14.  Pin your bias tape to the plastic side of the case, aligning the raw edges.  Using a 1/4" allowance, sew the bias tape all around. (I did not find pinning necessary but I sewed very slowly.) When you reach the end, overlap the tape by about 1" then cut off the excess.

It doesn't really matter where you start sewing.  However, if you have a preferred front flap for your case, start sewing the bias tape on what would be the back flap.

15.  Turn the bias tape over to the other side.  If it seems too tight, trim a bit off the seam allowance.  Iron this if you need to but just remember there's plastic underneath!


16.  Slipstitch the bias tape by hand, making sure you are concealing the raw edges and any stitching.


Yay!  That's it!  Now put your flash drives into the plastic pockets. Secure with the velcro closure.


You can attach this to your bag, use it as a keychain or hang it somewhere near your computer.  Never misplace your flash drives again!


Hope you will have fun making this simple project!


Rabu, 17 September 2014

Custard Mamon

Leche Flan = Custard
Mamon = Chiffon Cake
Custard + Mamon = Custard Mamon
Leche Flan + Chiffon Cake = Leche Flan Cake

Therefore, by the transitive property of equality:
Custard Mamon = Leche Flan Cake

This is just one of the many things I learned in Maths.  Simple, isn't it?  It just goes to show us that this little cake isn't a new invention.  It is simply a new form of an old thing that many of us already knew how to make.  And yet as consumers, we are so easily swayed by new packaging and new names!  True?


To be honest, I don't really like leche flan cake.  I don't like how the caramel syrup absorbs into the cake.  I don't like how baking the cake in a water bath somehow makes the sides of the cake wet and soggy.  I don't like how the weight of the flan squishes the soft cake once it is turned over.

But you know what? I cannot resist trying.  Even once.  Just for the heck of it.  So here you go.

CUSTARD MAMON (makes 10 pieces)

**Note: Leave your mamon tins UNGREASED.

For the caramel syrup, you will need 2 teaspoons of caster sugar for each mamon tin.  I use caster sugar because it melts more easily than regular granulated sugar.

Place one tin with sugar on the stovetop over very low fire.  Once the sugar starts melting, lift the tin with a kitchen tong then gently tilt the tin and swirl the melting sugar around until everything turns into a golden syrup.  Do not burn.  Set aside.  Repeat for the rest of the mamon tins.

Arrange tins in a large baking tray.


For the custard, combine in a small bowl:

3 eggyolks
1 whole egg
1 cup evaporated milk
1/4 cup caster sugar
1/2 teaspoon vanilla extract

Whisk until well combined and the sugar is completely dissolved.  Strain into another bowl or small jug.  Set aside.


For the mamon layer, prepare your chiffon cake batter using the mamon recipe here.  Remember to pre-heat your oven at this point.

To assemble:

1.  Pour about 1/8 cup of custard mixture into each mamon tin.  (If you have extra custard mixture, just redistribute evenly.)


2.  Fill the mamon tins with the chiffon cake batter to the very top. (I used my 2" ice cream scoop to do this easily.  Two heaping scoops per tin.)


Place baking tray in pre-heated oven then carefully add hot water (not boiling) to the tray just enough for the water to be about the same level as the custard layer.  About 1/4" high would do.

3.  Bake for 25-30 minutes or until tops are golden brown and a skewer inserted into the center of the cakes come out clean.


4.  Invert tins immediately onto a baking paper lined tray. Shake each tin gently to release the cake.


5.  Let the cakes cool completely before consuming.

That's it! Let me just emphasize that this is just a trial for me.  Don't really know if what I did was correct or not. You might want to try it too and give me some inputs on how to improve it, if necessary. Most people will argue that a cake like this should be cooled for several hours first and even refrigerated before inverting and unmoulding. The reason for this is to allow the leche flan to firm up. Personally, I don't want to wait because to me, watching a chiffon cake deflate (if it is not inverted right away) and sink is just utterly horrifying!  As you can see from the photos, the custard layer came out unscathed even though I did not wait for it to cool down.

Here is a link to a video about the Goldilocks custard mamon.  Sometimes all it really takes is just watching and learning then doing it yourself!

Rabu, 10 September 2014

Swiss Meringue Buttercream with Shortening

A few months ago, I bought a big tub of hi-ratio shortening with the intention of practicing piping buttercream flowers.  At the same time, I also wanted to learn a few other buttercream techniques that I knew could only be done with a crusting buttercream.  After making two batches of American-style buttercream, however, I confirmed what I already knew all along - I didn't like it!

And so my tub of shortening got shelved and forgotten until recently when I remembered to check it and realized that it was already nearing its "best before date".  The tub was still about 3/4 full so rather than having it all go to waste, I had to think of something to do with it.

Below is a recipe for Swiss meringue buttercream that uses some shortening.  While I have yet to test it in warm conditions, the shortening is supposed to make it more hot weather-friendly than one with pure butter.  I have always been hesitant to make frosting with shortening but I must admit that this has converted me.  It does taste wonderful plus it spreads really easily and smoothly.  Using hi-ratio shortening results in no greasy mouth feel that is typical of regular vegetable shortening.  The icing sugar adds some stability to the buttercream too and because it's just a small amount, it doesn't make the buttercream too sweet nor does it make it have that powdery, sugary texture.  While this version is a little bit heavier than normal swiss meringue buttercream, its stiffness makes it more ideal for piping.  I found that my roses came out a lot better!

The procedure is basically the same as normal SMBC.  If you haven't made that, just refer to this post as it has step by step photos.

SWISS MERINGUE BUTTERCREAM with SHORTENING

3 eggwhites, room temperature
¾ cup granulated white sugar
1/2 cup sifted pure icing sugar
1 cup unsalted butter, very soft
6 tablespoons hi-ratio shortening (~85g)
pinch of salt
1 1/2 teaspoons vanilla extract

In a large, clean heatproof bowl, combine the eggwhites and sugar. Set the bowl over (but not touching) simmering water in a saucepan and heat the mixture, whisking constantly, until the sugar has completely dissolved and the mixture is very warm to the touch. Remove the bowl from the saucepan.

Using an electric mixer on high speed, beat the eggwhite mixture until it is fluffy, cooled to room temperature, and holds stiff peaks.  Add in the icing sugar then beat until well incorporated.

With the mixer on medium-low speed, add the butter and the shortening, about a tablespoon at a time. Beat on high speed until it is smooth and creamy. Add salt and vanilla extract and beat until combined, scraping down the sides of the bowl as needed.

Before using, beat using the paddle attachment to knock off any excess air.

Here are two cakes I've made using this buttercream:

A mocha caramel cake -


Numeral cakes for a 40th birthday -


I loved how these cakes turned out so until my hi-ratio shortening runs out and most likely in the summer months too, I will be using this buttercream recipe.  Try it!

Rabu, 03 September 2014

Fluffy Mamon

I don't exactly recall when was the last time I've actually eaten mamon.  I'm guessing 20 or so years ago. Even while still living in Manila, it was so rare for me to buy anything from the bakeshops, not even cakes.  Funny but I somehow associate mamon with visiting someone in the hospital or going to a funeral wake.  I know it sounds odd but in the Philippines, this is the common type of food that gets brought and offered in these places!

Mamon is just a sponge or chiffon cake so while I've not eaten it in this form, I've eaten the actual cake many, many times in the recent past.  There is really nothing extra special about it except that it is super light and soft, it's buttery and it gives you a nice, quick fix when you are in need of a snack.


As you most likely know by now, when baking a chiffon cake, there are some important rules to follow for success, two of which are: 1) Never grease the pan; and 2) Invert the cake immediately after baking and let it cool completely before unmoulding from the pan.

I didn't follow these two rules when making my mamon.  Why?  First of all, because mamon tins are fluted, I didn't want the cake to stick then get wrecked when I try to remove them.  For this reason, I greased the tins with butter.  Wasn't sure how it would affect the outcome but I was willing to risk it. Secondly, I released the cakes immediately after baking.  I did this because I noticed that when I baked chiffon in smaller portions, like in a cupcake tray or in a small loaf tin, the cake almost always shrunk considerably and even caved in from the bottom.  By releasing the cakes before it actually started to pull away from the sides of the tins, I was hoping that I could minimize the shrinkage. 

I know that mamon has to be buttery so I contemplated on using melted butter in place of oil in the recipe.  After doing some research, I decided against it because I read that using butter will alter the texture of the cake and I didn't want that.  Then I remembered that I had this - 


Haven't tried this butter extract before but now is a good time for a first try, isn't it?

HOW TO MAKE FLUFFY MAMON:

1. Prepare 10 mamon tins by greasing them with softened butter. (Note: My mamon tins are quite small.  The bottom is only 3" in diameter and the top, about 3 3/4".  The height is just a little over an inch.  As I had bought these in the Philippines, I am assuming this is a standard size.  Don't know if it is available in larger sizes though.) **IMPORTANT UPDATE re GREASING TINS (6/9/14): Please scroll to the bottom of this post.


2.  Make your chiffon cake batter.  This recipe is enough for 10 pieces of mamon.

Ingredients:

{A}
1 cup plus 2 tablespoons sifted cake flour
1 ½ teaspoons baking powder
½ teaspoon salt
6 tablespoons white sugar

{B}
¼ cup corn/canola oil
4 egg yolks, from large eggs, at room temperature
1/3 cup water
½ teaspoon butter, vanilla, lemon, or orange extract (whichever you prefer)

{C}
4 eggwhites
¼ teaspoon cream of tartar

{D}
6 tablespoons white sugar

Procedure:

1. Preheat oven to 170 degrees Celsius.
2. In a large bowl, combine {A} well. Add in {B}. Beat with electric mixer or by hand until smooth and well blended.
3. In a separate bowl, beat {C} on high speed until frothy. Gradually add in the sugar {D} and beat until stiff peaks are formed. Gradually and gently fold in egg whites into egg yolk mixture.


3.  Distribute the cake batter evenly into the 10 tins.  Give the tins a gentle shake and a tap to remove air bubbles and to level off the batter.  Arrange them in a large baking tray.


4.  Bake in preheated oven for 25-30 minutes or until tops are golden brown and a skewer inserted into the center of the cakes come out clean.


As you can see from the photo above, the cakes had risen well inspite of the fact that the tins were greased.

5.  Immediately invert the tins into a baking paper-lined wire rack.  Tap the tins to release the cakes.  Be careful not to burn your fingers!


6.  Turn the cakes over.


Although the cakes somewhat lost their puffy tops, they didn't cave in.  The tops just levelled off.  The bottoms were okey as well.  


7.  While still warm, brush the tops with softened (or melted) butter.  This will allow the cakes to absorb some of the butter thus giving it more flavour.  Finish off  by sprinkling some granulated sugar on the tops.


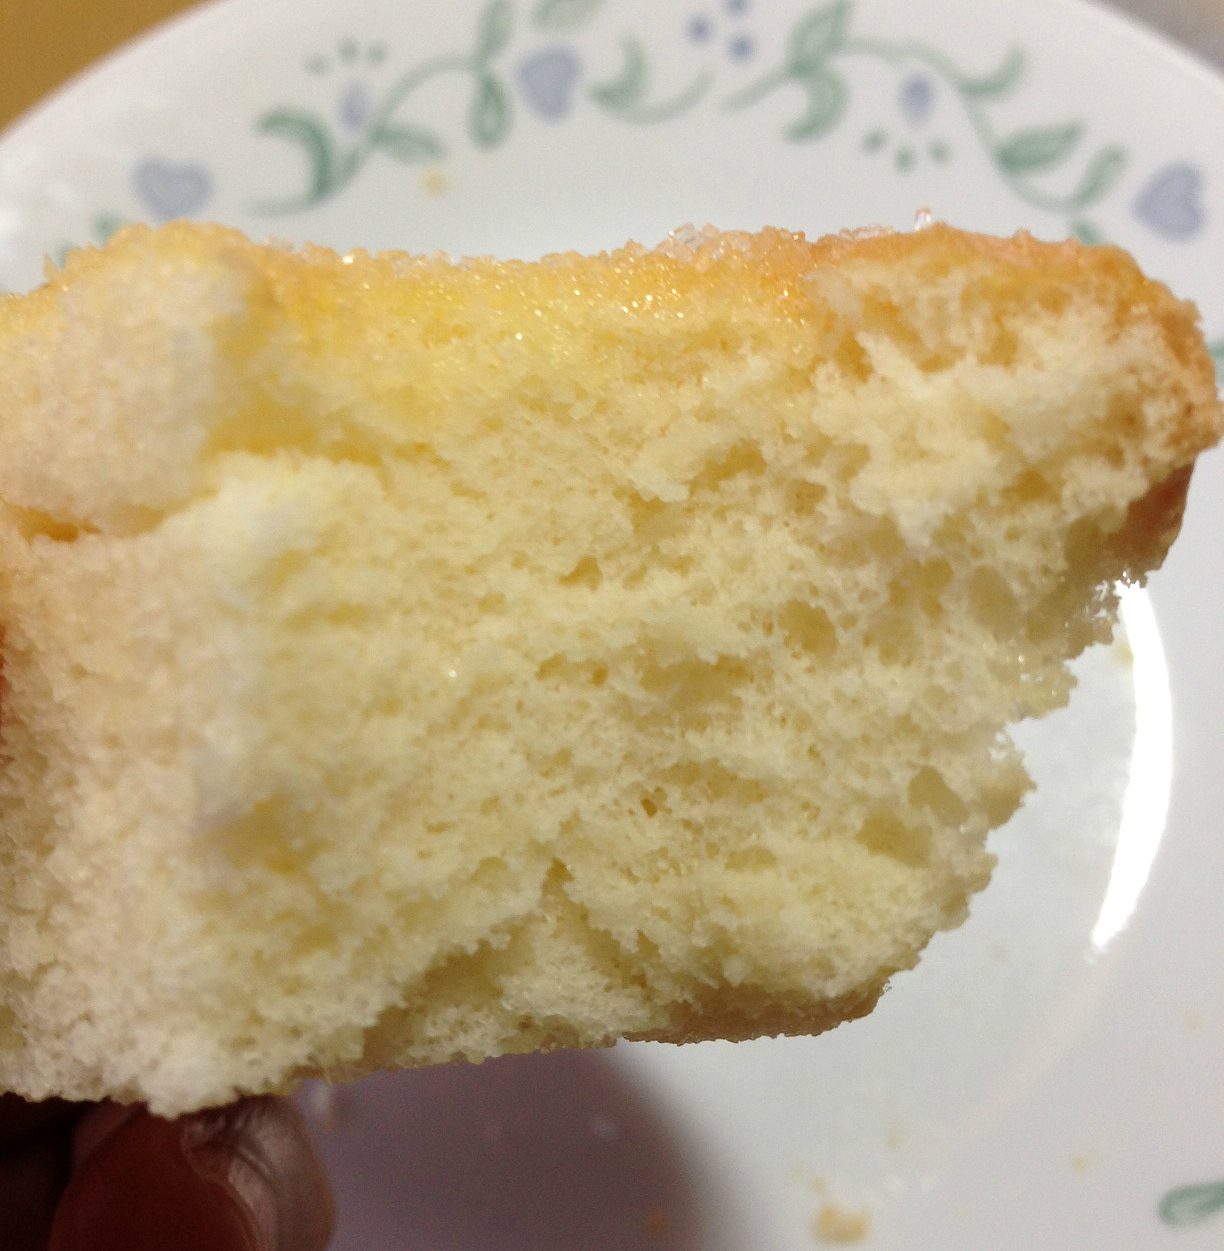
 8.  Now bite into one and see how soft and fluffy it is!


If not eating them right away, once they are completely cool, wrap the mamon in wax paper or cellophane to keep them fresh.  Enjoy!


UPDATE (6/9/14):  I had some extra chiffon cake batter today which I baked in two completely ungreased mamon tins.  I am happy to report that the cakes did not stick at all and they came right out when I inverted them!


I did the same thing and removed them from the tin as soon as they came out of the oven.  There was very minimal loss (if any) in height, even less than the batch baked in greased tins.


Same fluffiness too.

So yeah, if you'd like to try, I would recommend not greasing the tins.