Minggu, 03 Mei 2015

Ube cupcakes

What a long day it was yesterday!  We invited friends over for the Pacquiao-Mayweather fight.  Naturally, I had to wake up early to start cooking and preparing.  I used up all my grated ube on hand to make puto and totally forgot that a friend had asked me to make ube cupcakes for today (Monday).  So after all our guests had left (which was already late afternoon), I had to make a quick trip to the Asian shop to buy grated ube.

To be honest, I have not made ube cupcakes before.  I told my friend that if she really wanted ube cupcakes, I would have to experiment.  But really, I had no time to experiment at all! It was a risk. I had to make good in one go as I could not afford and had no more extra time for mistakes!

After dinner last night, even if I was already so tired and sleepy, I went ahead and made the cupcakes.  I have been asked many times if the vanilla cupcake recipe I posted here before can be altered to make them ube.  This is my first time to try.  Well, let's see how it went...


How does it look to you?


The cupcake was moist with a tight crumb.  Even if I added a bit more baking powder, I really did not expect it to be the super soft and fluffy type because of the added ube.  Even my ube chiffon cake is a bit more dense (though still soft) than plain chiffon cake.  The cupcake did taste very much like ube though which I guess is the most important thing.  One other thing I especially liked is that the cupcakes were purple all the way through, from the tops, to the sides, to the insides, to the bottoms. No browning whatsoever that is very typical with other ube cupcakes I've seen on the web.


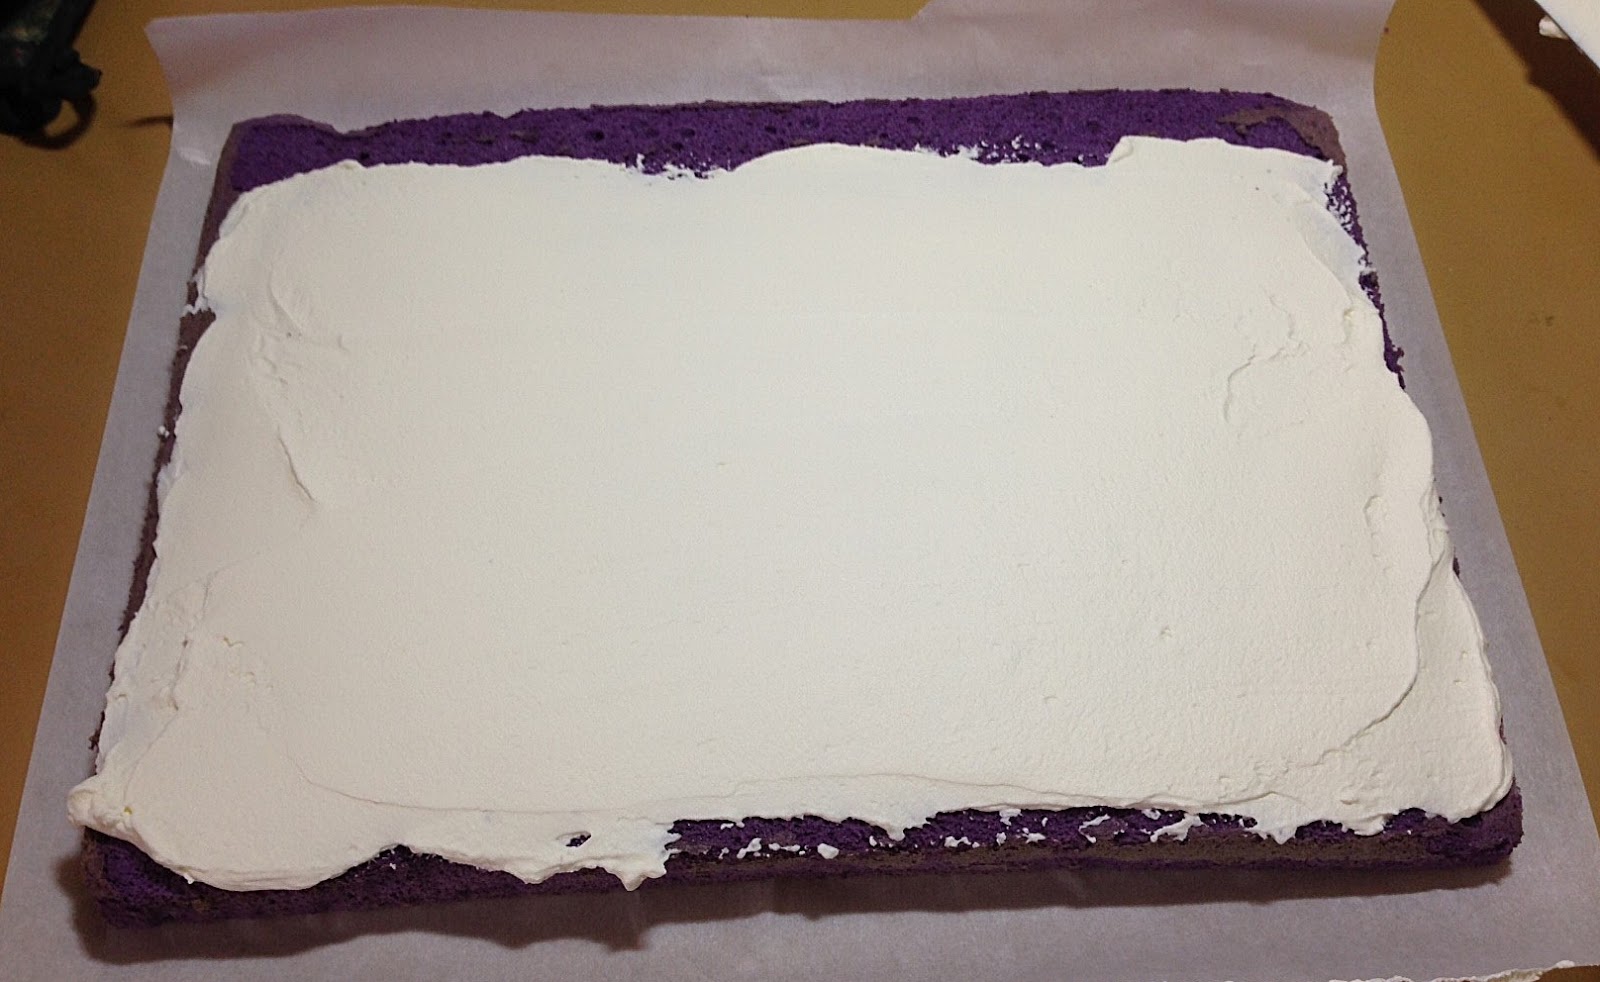
I paired the cupcakes with the usual whipped cream frosting, the same I use for my ube cake.  This is the only kind of frosting I like with ube.  Buttercream with ube doesn't quite work for me personally.

I'm not going to claim that this is the best ube cupcake you can make.  I know it can still be improved somehow.  For now, however, it's worth a try if you are up for some experimenting.  Let me know if you do.

UBE (PURPLE YAM) CUPCAKES (makes about 20)

Ingredients:
2 1/2 cups sifted cake flour
3 tsps baking powder
1/4 tsp baking soda
1/2 tsp salt
1/2 cup unsalted butter, softened
1 1/2 cups granulated white sugar
2 eggs, room temperature
1 teaspoon ube flavouring
1/4 tsp violet powdered food colour or gel paste
100 grams grated ube
1 cup buttermilk

Procedure:
1.  Preheat oven to 170 degrees C.  Line muffin trays with baking cups.
2.  In a medium bowl, sift together cake flour, baking powder, baking soda, and salt.  Whisk to combine.  Set aside.
3.  Using an electric mixer,  starting from a low speed gradually increasing to high, cream butter and sugar together until very light in colour and fluffy.  
4.  With mixer turned down to medium-low speed, beat in eggs one at a time.  Add in ube flavouring, violet food colour then the grated ube .
5.  In three additions, alternately add in flour mixture and buttermilk, starting and ending with the flour mixture.  Scrape bowl as needed to ensure that everything is incorporated well.  After the last addition, beat at high speed for the last time for about 45-60 seconds.
6.  Fill each baking cup with the cupcake batter about 3/4 full.
7.  Bake for about 22-25 minutes.  Transfer each cupcake immediately to a wire rack to cool completely.

Make 3/4 recipe of the Whipped Cream frosting here.  Use to frost each cupcake.  If desired, crumble one cupcake and use the crumbs for garnishing.


PS. Hope all of you readers are doing well!  It's been a long time.

For other things UBE: chiffon cake, puto, cake roll.

Senin, 02 Maret 2015

Eggyolks (and how I sometimes not waste them)

Almost every weekend, after finishing all my buttercream covered cake orders, I am left with a container of eggyolks.  I am not always in the mood to cook something up so at times, these eggyolks go to waste unfortunately.  My excuse - it's collateral damage.  My husband doesn't approve of waste so he sometimes eats them (inspite of the cholesterol overload).  Lately, he has been asking if he can put them in his worm farm (but only if I wasn't going to use them for something else.)

When I have time and am not lazy, I use the eggyolks to make one of two things or on occasion, I make both, like yesterday.


You already know that I have the best ensaymada recipe, right? (If you don't, then better head on to the recipe here!) This used to be considered a treat in our household but now, it has become a regular thing because of the abundance of eggyolks.

Most people find it daunting to even think about making ensaymada.  I also felt that way before. These days, however, I have eliminated the stress by preparing them in stages.  I stop when I have to and simply put the dough in the fridge to rise overnight then continue the next day.


Last week, for instance, my dough was already coiled and in their individual tins.  As it was already quite late, I just left them in the fridge for the night, took them out early the next morning (I got up just to take them out then went back to sleep.) and let them sit at room temperature for about 1 1/2 hours before I baked them.  They were ready just in time for breakfast.

With my most recent batch (the ones pictured here), I kept the dough in the fridge overnight and coiled them the following day.  They took so long to rise in the tins, probably because the dough was really cold and the weather was quite cold too.  The ensaymadas weren't ready till afternoon!  


While waiting for my ensaymadas, I used some of the other eggyolks to make another treat.


Lemon curd!  My daughter and I absolutely love this stuff on toast.  Or sometimes, we just eat it straight from the jar, in a spoon.  I know it's also great as a cake filling but I haven't tried that yet.


See how creamy that is?  It is super easy to make and a great way to use those eggyolks.  (The fact that we have two lemon trees is another plus for us.)  If you want to make one, I highly recommend this recipe.  

I'm sure there are tons of other uses for eggyolks.  These two are just my favourite ones.  Any other great ideas, please feel free to share on the comments section below!  Not leche flan, please! :)

Have a good week!

Senin, 26 Januari 2015

Mocha cake roll

Last Sunday, my brother and his wife celebrated their silver wedding anniversary.  After renewing their wedding vows amongst retired priests and nuns, we proceeded to their home where their friends (lots of them!) were waiting to celebrate the occasion with them.  As you would expect, I volunteered to make a cake for them.  I didn't have much time to fuss about this cake as the night before, it was also my eldest son's 21st birthday party.  We were all so busy and tired and lacked sleep.  I had to get up at 6am the next morning to finish my brother's cake.


Their family friends love my mocha cake and so that is what I made for them.  Not until they started asking if the roses totalled 25 (because it was for a 25th anniversary) did I realize that I should have thought of doing that!  I simply divided the cake into equal, even sections and was one rose short :(! 


Before the cake was served, I was babysitting this adorable 9-month old baby girl.  She fell asleep in my arms and I didn't want to put her down as everyone was so noisy.  So for the next 2 hours (I think), I just sat there, happily staring at this cute bundle of joy.  They served the cake during this time and I didn't even get to taste it! It was actually a pretty funny sight, seeing all those people with their little plates all lined up waiting for their turn to get a slice. :)))  Just like that, the cake was all gone.

Well anyway, today I decided to make mocha cake just because I didn't get to eat some the other day.  Instead of making it into the usual cake, I rolled it up just like I did the ube cake in my last post.  


I prefer leaving the roll unfrosted because the filling and the rosettes on top (garnished with chocolate flakes) is more than enough buttercream for me.


I didn't take step by step pictures.  I won't put the recipe here as well.  The process is the same as the ube cake roll and the recipe is basically the same as the mocha chiffon cake, except that the cake flour is down to 1 cup (instead of 1 1/8).  The Swiss meringue buttercream is also the same, just flavoured with 1 tablespoon of instant coffee powder that has been dissolved in a little hot water.  If you want to frost the entire cake with buttercream, you will have to make more, perhaps one and a half recipe.  I had some leftover SMBC but that amount isn't enough to cover the whole cake.


If you are a mocha cake lover, you might want to try this sometime.  It's nothing fancy and you don't even need decorating skills to do it.  I'm sure you will like it.

Enjoy the rest of your week!

Minggu, 28 Desember 2014

Ube cake roll

This will be my last post for 2014.  I do not know WHEN I will be back or IF I will be back.  At this point, I feel I just need time to reassess whether this blog is still something I want to continue in the coming year or if I would want to do something else.

After a year that has been totally overflowing with cakes and more, it is but fitting to finish off with a last recipe. This is my end-of-the-year gift to all of you.

An ube cake roll!  Simple but lovely and tasty as it is.  No frosting needed.  No frills.  


The cake is basically made in the same way as the normal ube chiffon cake, except that it has a little less flour.  This adjustment allows for a more flexible, easier to roll cake.


Something new I learned from making the deco roll cakes is that it is really not necessary to roll the cake straightaway.  Normally, with jelly/swiss roll cakes, you would need to roll the cake in parchment paper or a tea towel dusted with icing sugar while still hot so the cake will cool down in this shape and will be easier to re-roll once filled.  What I found out is that all you need to do is loosely cover the cake with parchment paper while it is cooling down in a wire rack to keep the moisture in but at the same time, letting heat escape. It does work!

I've never really had much success with roll cakes until recently, so I hope you will get to try this cake and be happy with it just like me! :)

Here goes:

For the chiffon cake:

Ingredients:

{A}
1 cup cake flour
1 1/2 teaspoons baking powder
3/8 cup sugar
1/2 teaspoon salt

{B}
4 egg yolks
1/4 cup vegetable/canola oil
1/3 cup milk
50 grams grated purple yam
1/2 teaspoon ube flavouring
1/4 teaspoon violet gel paste or food powder

{C}
4 egg whites
1/4 teaspoon cream of tartar

{D}
3/8 cup sugar

Procedure:

1.  Preheat oven to 170 degrees Celsius.  Line a 10"x15"x1" or 11"x16"x1" jelly roll pan with parchment paper.  Grease parchment paper with a little oil.

My baking pan is actually a 10"x14"x1 1/2" so the resulting cake is a little bit thicker than what is ideal.

2.  In a large bowl, combine {A} well.  Add in {B}.  Beat with electric mixer or by hand until smooth and well blended.
3.  In a separate bowl, beat {C} on high speed until frothy.  Gradually add in {D} and beat until stiff peaks are formed.  Gradually and gently fold in egg whites into egg yolk mixture.  Pour batter into prepared jelly roll pan then spread evenly to the sides.  Bang pan on the counter a few times to dislodge air bubbles.


4.  Bake for about 25-30 minutes.


5.  Cover the top of the pan with a new piece of parchment paper then invert onto a wire rack. Unmould the cake then immediately peel off the parchment paper from the bottom.


6.  Cover the cake with another piece of parchment paper.  Leave to cool just until it is no longer warm to the touch, about 15-20 minutes.


While waiting for the cake to cool down, prepare your whipped cream filling.  You can make half the stable whipped cream recipe here or if you want something simpler, you can just use this.

Whipped cream filling:

1 1/4 cups thickened or whipping cream, very cold
2 tablespoons caster sugar

Combine ingredients in a cold mixing bowl.  Beat until stiff.


To assemble cake:

**It is best to assemble the cake as soon as it is no longer warm.  The longer the cake sits, the drier it will become and will most likely crack when rolled.

Carefully flip the cake over.


Spread about 3/4 of the whipped cream filling evenly on the cake, leaving about an inch space at the top.


Starting from the side nearest you and using the parchment paper as a guide, gently roll the cake.


This is what the newly-rolled cake looks like from the side.

Refrigerate the cake for about an hour to allow it to firm up a bit and make it easier to handle.  Chill the remaining whipped cream as well.

Unwrap the parchment paper then trim about an inch off the two ends.  Transfer cake to a serving tray.

Doesn't that look just perfect?

Fill a small piping bag fitted with a large star tip with the remaining whipped cream then pipe out rosettes along the top of the cake roll.  Top each rosette with a macapuno ball, if desired.


Keep the cake covered to retain its soft and moist state. Serve chilled to enjoy it at its best!


A blessed 2015 to all!

Rabu, 24 Desember 2014

Christmas greetings


From Melbourne to the rest of the world, here's wishing you all a blessed Christmas!

May you receive the lasting gift of joy, peace, and love that comes from Jesus Christ.

Have a great time celebrating with family, friends, and all your loved ones!


Senin, 22 Desember 2014

My new favourite thing to make

If you still haven't seen or heard about decorated roll cakes, then you must have been living under a rock in recent times!  Deco roll cakes were created and popularized by a famous Japanese food blogger named Junko.  As with anything Japanese-made, these cakes are just oozing with cuteness!

Image credit: kao-ani.com
Image credit: japanrollcake.com

I have been wanting to buy Junko's books since early last year but they were written in Japanese.  I really didn't want to go through the struggle of translating so I had to forego buying them and content myself with just admiring photos of deco roll cakes online.

Just over a week ago, while looking for books on the internet, I accidentally discovered that Junko's books have already been published in English!  Of course, I wasted no time in ordering them!!!


So far, I have tried making three of the deco rolls in the first book, all of them incidentally featured in the cover.

Strawberry print roll - vanilla flavoured cake with whipped cream and strawberries.


Teddy bear deco roll - chocolate flavoured cake with whipped cream, mangoes and strawberries.


Arabesque motif deco roll - matcha flavoured cake filled with whipped cream and sweet red bean paste.


The cakes are chiffon-type so as expected, they are very soft and moist.  However, unlike the chiffon cakes that I am used to making, these ones have less cake flour and have no baking powder.  I think the lower flour content makes the cakes easier to roll.  They do not crack at all!  (And they are not even rolled while still hot.)

As you know, my family isn't all that crazy about eating cake so while I hope to try all of the designs in the books (as well as make my own), I really have to control myself.  At first, I thought the cuteness was enough to convince my kids to keep on eating the cakes one after another, but now I realize that no matter how light and delicious they are, I cannot keep on making them every single day!  I should really consider giving these as gifts!

You will definitely see more of these cake rolls here in the future.  I really wasn't keen on making cake rolls before but now that I've tried and found the process quite easy, I think my next move would be revising my own chiffon cake recipes so they would be more suited to be made in this manner.  Hmmm,,,I reckon I'll start with an ube cake roll. :)

Till next time.

Jumat, 12 Desember 2014

Ending my caking year

I am so sorry for being away for almost a month.  The 2014 school year concluded early December so as you can imagine, I have my hands full with the kids in the house all the time.  Also, I have been concentrating on finishing all my cake orders for the year.  I am taking a break starting this coming week till early January so I can do things that I have been procrastinating on (#1 on the list: a second book).  Plus I also want more time to prepare for Christmas.

For my last big cake commitment, I made a two-tiered cake, a large caramel cake plus two dozens red velvet cupcakes for an 18th birthday party.  As you will see, I went all out on the buttercream roses! I really like the old-fashioned look they project even though gumpaste flowers may look more life-like.


In this past year, I think I made more caramel cakes than ever before.  Since I started selling cakes, my most sought-after product was the ube macapuno, but now, people have shifted to the caramel cake.  I believe this cake suits the Filipino taste best because it's not overly sweet.  More than that though, there is just something so endearing about the buttercream roses, don't you agree?  Oh and let's not forget those lace-like squiggles too - no matter how messy they seem to appear while piping them, they still end up complementing the whole traditional vibe. 


I really loved making this two-tiered cake although at first, I was afraid it was going to be a complete disaster. While positioning the roses and piping the leaves, I kept on hitting the soft buttercream. This is the downside of using a non-crusting buttercream like SMBC.  You can't smooth it out just like that!  If you look close enough, you will notice the uneven cake comb marks on the bottom tier.  I accidentally touched it and couldn't fix it properly because the ribbon and the roses were already in place :(


I piped all the buttercream roses the night before I assembled this cake and put them in the freezer.  It was a breeze to just position them all later.


I didn't totally go all-buttercream and it would have been really neat if I did.  The #18 topper and the cutout letters for the celebrant's name were made from gumpaste.  I also moulded gumpaste roses and cut out leaves for the cupcakes.  It just saves time to be able to do all these in advance.


So there you go.  That is my way of ending my caking year with a bang.  I still have a few more cakes to do before Christmas though nothing extraordinary.  Hopefully, if all goes as planned, our Christmas cake will be something new.